In my first post of this two part series, I showed you how to automate the creation of iSCSI luns on Windows Server 2012 using PowerShell. In this article, I’ll show you how to mount the luns as vmfs datastores on an ESXi server using PowerCLI.
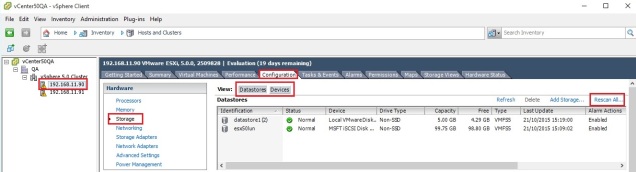
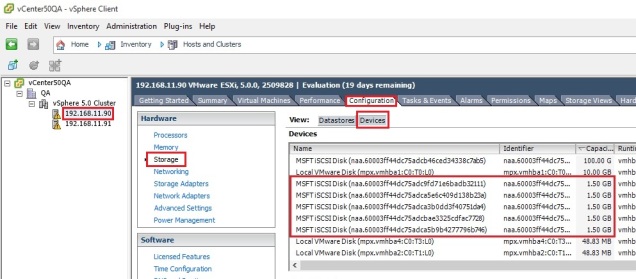
I’m using vCenter to manage 2 ESXi hosts in my test lab which I’ll connect to using the traditional (C#) vSphere client. Once connected, highlight one of the ESXi hosts, click on the “Configuration” tab and select “Storage” under the “Hardware” pane. Take a note of the existing datastores and then change the view to “Devices” and click on “Rescan All …”.

With the above information at hand, we amend the script so that it only targets the devices we want it to using the device name prefix and capacity as search criteria.
We do this as follows;
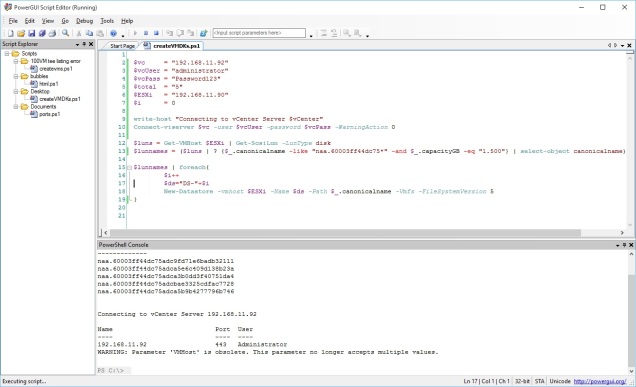
$luns = Get-VMHost $ESXi | Get-ScsiLun -LunType disk
$lunnames = ($luns | where {$_.canonicalname -like “naa.60003ff44dc75*” -and $_.capacityGB -eq “1.500”} | select-object canonicalname)
The first line simply initializes var $luns with a list of iSCSI luns attached to host $ESXi. The second line pipes $luns into a where-object (can be written as ? or where) statement. Remember that in PowerShell we’re constantly dealing with objects. We specify the device name prefix and capacity as search criteria thus filtering out those devices we do not want mounted as datastores. The select-object cmdlets finally populates the $lunnames var using the “canonicalname” property to generate a list as follows;
PS C:\> $lunnames
CanonicalName
————-
naa.60003ff44dc75adc9fd71e6badb32111
naa.60003ff44dc75adca5e6c409d138b23a
naa.60003ff44dc75adca3b0dd3f40751da4
naa.60003ff44dc75adcbae3325cdfac7728
naa.60003ff44dc75adca5b9b4277796b746
Next we loop through each object in $lunnames, reading its “canonicalname” property which we feed to the New-Datastore cmdlet as a value to the Path parameter.
lunnames | foreach{
$i++
$ds=”DS-“+$i
New-Datastore -vmhost $ESXi -Name $ds -Path $_.canonicalname -Vmfs -FileSystemVersion 5}
By looking at the status bar in the vSphere client, we can see each datastore being created.

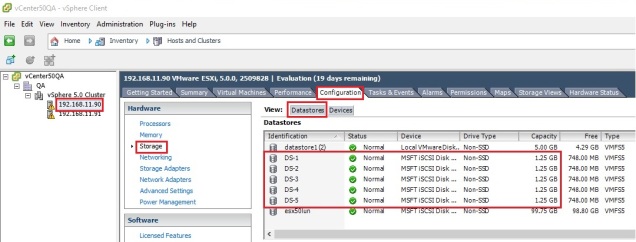
This works great for those testing scenarios where you need multiple datastores created fast. For a production environment you will probably want to go down the manual route.
I hope you found this article useful. Until next time.
Cya
Script:
#Change as required
$vc=”192.168.0.1″ #vCenter IP address
$vcUser=”your account” #vCenter user account
$vcPass=”your password” #vCenter password
$total=”5″ #Max. number of datastores created
$ESXi=”192.168.0.2″ #IP address – must match initiator
$i=0 #Init counter
write-host “Connecting to vCenter Server $vc”
Connect-viserver $vc -user $vcUser -password $vcPass -WarningAction 0
$luns = Get-VMHost $ESXi | Get-ScsiLun -LunType disk
$lunnames = ($luns | ? {$_.canonicalname -like “naa.60003ff44dc75*” -and $_.capacityGB -eq “1.500”} | select-object canonicalname)
$lunnames | foreach{
$i++
$ds=”DS-“+$i
New-Datastore -vmhost $ESXi -Name $ds -Path $_.canonicalname -Vmfs -FileSystemVersion 5
}
